- Supplies Needed: Large stretched canvas, heavy-body acrylic gesso, a long metal ruler or straight edge, a palette knife with a straight edge, and matte white or ivory spray paint.
- How to Make It: Prime your canvas with a base coat of white paint. Use a pencil and a long ruler to lightly map out a balanced grid pattern across the canvas surface. Load your straight-edged palette knife with a thick layer of heavy-body gesso. Align the palette knife along your pencil lines and pull it steadily upward or across to lay down crisp, raised ridges of gesso. Repeat for all grid lines, wiping the knife clean between pulls. Allow the heavy gesso to cure and dry completely for 24 hours until hard, then coat the entire piece evenly with matte white spray paint for a uniform sculptural finish.
- Tips & Variations: Leave the recessed squares unpainted or stain them with a watered-down raw umber wash to create a stunning antique manuscript effect.
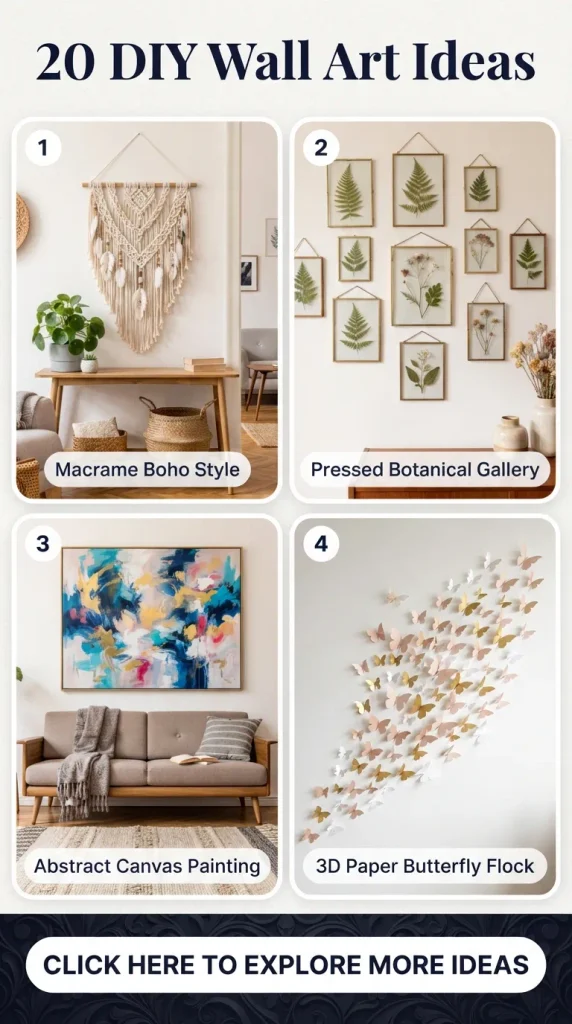
16. Modern Macrame Wall Hanging with Driftwood Macrame has evolved far beyond 1970s retro craft; modern iterations feature clean geometric knots, dipped dyes, and minimalist styling that fits seamlessly into Scandinavian and Japandi homes.
- Supplies Needed: Natural driftwood or a smooth wooden dowel, several spools of 3mm or 4mm single-twist cotton macrame cord, sharp scissors, and fabric dye (optional).
- How to Make It: Cut dozens of long cotton cords according to your desired length. Attach them to your driftwood base using standard lark’s head knots. Begin tying foundational rows of square knots and diagonal half-hitch knots to build structured diamond patterns or cascading chevron shapes. Leave the lower half of the cords loose and untied as a lush, flowing fringe. Trim the bottom fringe straight or in a sweeping V-shape using sharp fabric shears.
- Tips & Variations: Dip-dye the bottom half of the cotton fringe in a warm terracotta or sage green liquid fabric dye for a chic, two-tone ombre effect.
17. Pressed Fern Trio in Floating Gold Frames Simple repetition creates powerful visual statements. Displaying three identical, tall floating gold frames featuring delicate forest fern fronds brings a calming, botanical greenhouse atmosphere indoors.
- Supplies Needed: Three matching slim brass floating frames, freshly pressed sword-fern fronds, heavy cream cardstock paper, and fine tweezers.
- How to Make It: Lay your cream cardstock backing paper inside each of the three floating frames. Carefully center a single, perfectly pressed fern frond on each sheet using fine tweezers, ensuring the stems align vertically. Sandwich the glass panes together and secure the hanging clasps. Hang the trio in a straight horizontal line with equal three-inch spacing between each frame to anchor a living room sofa or hallway console table.
- Tips & Variations: Back the frames with vintage ledger paper instead of plain cardstock for a charming antique academic touch.
18. Abstract Charcoal Gesture Drawing Expressive, raw charcoal drawings evoke emotional depth and high-end artistic sophistication. This project requires no formal drawing skills—only free-flowing, intuitive movement.
- Supplies Needed: Heavyweight drawing paper or charcoal paper (A1 or larger), compressed willow charcoal sticks, a kneaded eraser, and a workable fixative spray.
- How to Make It: Pin your large paper flat against a wall or lay it across a flat table. Stand back and let your body move freely. Using the side of your willow charcoal stick rather than the tip, make large, sweeping, imperfect strokes, looping curves, and deep shadows. Don’t aim for perfection; focus on rhythm, pressure, and contrast. Use a kneaded eraser to lift charcoal away in certain areas to create highlights. Once your composition feels balanced, spray the entire sheet thoroughly with a workable fixative to prevent smudging, then frame it in a black gallery frame with a white window mat.
- Tips & Variations: Pair this stark black-and-white charcoal piece with a warm wood frame to soften its dramatic, moody aesthetic.
19. Painted Clay Beads and Twig Wall Mobile Mobiles are no longer just for nurseries; modern kinetic mobiles crafted from earthy terracotta beads and foraged branches add delicate motion, balance, and sculptural grace to empty room corners.
- Supplies Needed: Air-dry clay, wooden or handmade clay beads, a foraged branching tree twig, strong nylon fishing line or waxed upholstery thread, acrylic paint in earthy tones, and a toothpick.
- How to Make It: Roll out your air-dry clay and shape various geometric elements—such as flat discs, spheres, and half-moons. Use a toothpick to poke clean hanging holes through each piece while the clay is still wet. Let them dry for 48 hours, then paint them in a curated palette of terracotta, warm sand, and olive green. Cut varying lengths of waxed thread, tying secure knots through your painted clay pieces. Suspend the weighted strings at balanced intervals from your main foraged twig branch, ensuring the mobile hangs level before securing the main ceiling hanging cord.
- Tips & Variations: Hang this gentle kinetic mobile in a bedroom reading nook where gentle air currents can make the geometric shapes sway gracefully.
20. Minimalist Gold Leaf Wood Panel Art A touch of metallic warmth instantly elevates any space from casual to luxurious. Adding delicate gold leaf accents to a dark-stained wooden panel creates a gorgeous interplay between rustic natural grain and luminous metallic shine.
- Supplies Needed: Square wooden canvas panel, dark walnut wood stain, gold leaf sheets (imitation gold leaf), gold leaf size (adhesive), soft application brushes, and a clean dry brush for burnishing.
- How to Make It: Sand your wooden panel and apply your dark walnut wood stain, wiping away excess to let the natural wood grain show through. Let it dry completely. Use a pencil to sketch out a minimalist organic circle, brush strokes, or geometric lines in the center of the panel. Paint your gold leaf adhesive (size) carefully over the pencil design. Wait approximately 15 to 20 minutes until the adhesive turns clear and tacky to the touch. Gently lay a sheet of gold leaf over the tacky area, and use a soft, dry brush to press and burnish the leaf down smoothly. Brush away any excess loose flakes to reveal a brilliant, gleaming metallic design.
- Tips & Variations: Combine copper leaf and gold leaf side-by-side on the same panel for a stunning mixed-metal modern look.
More ideas to come in future addition