- What This Idea Means: By deconstructing basic wood picture frames and connecting them into a three-dimensional box, you achieve a clean architectural lantern with real glass panes.
- Materials Needed:
- 4 Dollar Tree picture frames (same size, 4×6 or 5×7 inches)
- Hot glue gun or rapid-bond wood glue
- Matte black spray paint
- Glass cleaner
- 1 LED flameless pillar candle
- Faux moss or micro greenery garland
- Step-by-Step Instructions:
- Remove the backboards from all 4 frames. Keep the clear glass panes.
- In a well-ventilated space, spray-paint the front and back of all 4 frame borders in matte black.
- Once dry, clean the glass panes and secure each pane inside its frame using small dabs of hot glue on the interior corners.
- Glue two frames together lengthwise at a 90-degree angle. Join the remaining two frames to complete a 4-sided rectangular lantern structure.
- Place the open-topped lantern in the center of your table runner.
- Position an LED pillar candle inside the center and wrap a delicate ring of faux boxwood or spanish moss around its base.
- Pro-Tips & Creative Variations: Add a square piece of painted wood trim on top with a metal craft ring to create a hanging lantern silhouette.
8. Boho Macramé & Braided Jute Glass Vases
A casual, tactile design that brings coastal, boho, or Scandinavian warmth to summer brunches and outdoor evening tables.
- What This Idea Means: Simple glass cylinder vases gain texture when wrapped in macramé cords, braided jute twine, or natural nautical rope, softening harsh table surfaces with organic fibers.
- Materials Needed:
- 2–3 Dollar Tree glass cylinder or tapered vases
- 1 spool of thick natural jute twine or cream macramé cotton cord
- Hot glue gun and glue sticks
- Pampas grass or fresh field wildflowers
- Step-by-Step Instructions:
- Secure the start of the jute rope to the bottom perimeter of the glass vase with a dab of hot glue.
- Wrap the rope tightly around the circumference, applying small glue dots every 2 inches to ensure the cord remains aligned and taut.
- Continue wrapping upward until you cover either the bottom third (for a modern color-block look) or the entire vase surface.
- Trim the rope cleanly and seal the tail end flush against the vessel with glue.
- Fill the vase with dried beige florals, bunny tails, or fresh yellow solidago blooms.
- Pro-Tips & Creative Variations: Alternate between cream cotton cord and raw jute twine to generate contrasting striped horizontal bands across a trio of different-sized vessels.
9. Gilded Wine Glass Cloche Pedestals
A playful, upscale inverted centerpiece that uses everyday stemmed glassware to elevate candles while displaying botanicals underneath.
- What This Idea Means: Turning wine glasses upside down converts the bowl into a miniature display cloche for single flower blooms while turning the round base into an elevated platform for tea lights.
- Materials Needed:
- 3 Dollar Tree long-stemmed glass wine glasses (matching or varying stem heights)
- Metallic gold paint pen or gold spray paint
- 3 faux open rose heads or succulent blooms
- 3 metallic gold or white tea light candles
- Round beveled glass charger plate
- Step-by-Step Instructions:
- (Optional) Rim the circular base of each wine glass using a metallic gold paint pen for an accented lip.
- Place a round glass mirror or charger plate in the center of the table.
- Position single faux flower blooms onto the mirror plate.
- Invert each wine glass directly over a bloom so the flower head is cleanly enclosed inside the glass bowl.
- Place a tea light or small votive candle directly onto the flat base of each upside-down wine glass stem.
- Pro-Tips & Creative Variations: Fill the enclosed glass bowls with tiny battery-operated micro-LED fairy lights instead of flowers for a warm, magical light-orb effect during winter parties.
10. Antiqued Mercury Glass Compote Dish
A timeless vintage centerpiece style that complements romantic dinner settings, formal weddings, and holiday celebrations.
- What This Idea Means: By pairing vinegar-water misting with mirror-effect spray paint, standard glass ice cream or compote bowls receive the mottled, reflective patina of antique mercury glass.
- Materials Needed:
- Dollar Tree glass footed dessert bowl or sundae glass
- Krylon Looking Glass (Mirror Finish) spray paint
- Spray bottle filled with 50/50 white vinegar and water
- Paper towels
- Faux garden roses or dark berry floral sprigs
- Step-by-Step Instructions:
- Clean the interior of the footed glass bowl thoroughly.
- Lightly mist the interior of the glass with the vinegar-water spray bottle so fine droplets form along the glass walls.
- Immediately spray a light, even coat of mirror-finish paint directly over the wet vinegar beads inside the bowl.
- Wait 1 minute, then lightly dab the interior with a crumpled paper towel. The vinegar resists the paint, leaving semi-translucent, aged mercury glass speckles.
- Repeat with a second light coat and let dry for 30 minutes.
- Arrange deep crimson, mauve, or ivory blooms inside the footed compote.
- Pro-Tips & Creative Variations: Paint a light wash of dark gold or copper acrylic paint inside the bowl over the dried mirror paint to give your faux mercury finish an antique gold or bronze reflection.
11. Minimalist Wire Cage & Botanical Nest
A sharp, geometric design that blends clean industrial lines with the softness of green botanicals.
- What This Idea Means: Deconstructed wire wastebaskets or wire storage baskets flipped upside down become open geometric cages that house candles, nests of greenery, or decorative items.
- Materials Needed:
- Dollar Tree small metal wire wastebasket or wire wire-grid pencil cup
- Matte black or satin metallic copper spray paint
- Wire cutters
- Faux eucalyptus ring or preserved spanish moss
- Glass votive holder with LED candle
- Step-by-Step Instructions:
- Spray-paint the metal wire basket in matte black or industrial copper. Allow 1 hour to dry.
- Invert the wire basket so the broad base rests on your table surface.
- Place a ring of faux eucalyptus or Spanish moss directly in the center of the table beneath the wire structure.
- Position a clear glass votive holder with an LED candle inside the botanical nest.
- Lower the wire cage over the candle and greenery cluster to frame the glowing light through clean geometric lines.
- Pro-Tips & Creative Variations: Use floral wire to attach fresh sprigs of rosemary or olive leaves directly to the outside wire framework for a fragrant, interactive dining centerpiece.
12. Floating Botanical Wine Bowl Ring
A low-profile, clean centerpiece that surrounds a glowing glass centerpiece with circular floating botanicals.
- What This Idea Means: Wide, shallow glass bowls allow multiple elements—such as water, floating tea lights, and cut flower heads—to be viewed from above without blocking the view of guests seated across the table.
- Materials Needed:
- Dollar Tree wide, shallow glass bowl
- Distilled water
- Fresh rose heads or daisy heads (stems clipped flush to the calyx)
- 3 white floating disc candles
- Clear glass floral stones or decorative sea glass
- Step-by-Step Instructions:
- Place the shallow bowl in the middle of your table setup.
- Line the base of the bowl with clear glass stones to anchor the bottom.
- Pour room-temperature distilled water into the bowl until it reaches 1 inch below the lip.
- Gently place trimmed flower heads on the water surface; their natural surface tension and petal spread will keep them buoyant.
- Place 2–3 floating disc candles between the flower heads.
- Light the candles just before guests arrive.
- Pro-Tips & Creative Variations: Add a drop of essential oil (like rose water or citrus) into the bowl water to create a soft, aromatic experience as the candles warm the liquid.
13. Minimalist Wood Bead & Glass Cloche Display
A clean, light Scandinavian design pairing raw wood textures with clear glass curves.
- What This Idea Means: A small wooden craft plate or round frame adorned with raw split wood beads forms an elevated organic base for a clean glass dome.
- Materials Needed:
- Dollar Tree round wooden craft circle/plaque (5–6 inch diameter)
- Dollar Tree pack of split half-round wooden beads
- Clear glass cylinder vase or glass bowl (sized to fit inside the plaque)
- Wood glue or hot glue
- Single faux succulent, air plant, or small sculptural candle
- Step-by-Step Instructions:
- Glue the flat side of the split wooden beads side-by-side along the entire outer rim of the round wooden plaque.
- Leave the wood natural, or apply a clear matte wood sealant to maintain the raw Nordic aesthetic.
- Place a miniature faux succulent or textured pillar candle in the center of the wooden base.
- Invert a clear round-bottom glass bowl or wide glass cylinder over the arrangement to serve as a glass cloche dome.
- Pro-Tips & Creative Variations: You can stain the wooden base in dark espresso and display miniature brass figurines or seasonal pinecones under the glass dome during winter months.
14. Monochromatic Ombré Taper Candle Array
A colorful, modern centerpiece that uses dynamic color gradients across varying heights for vibrant celebration tables.
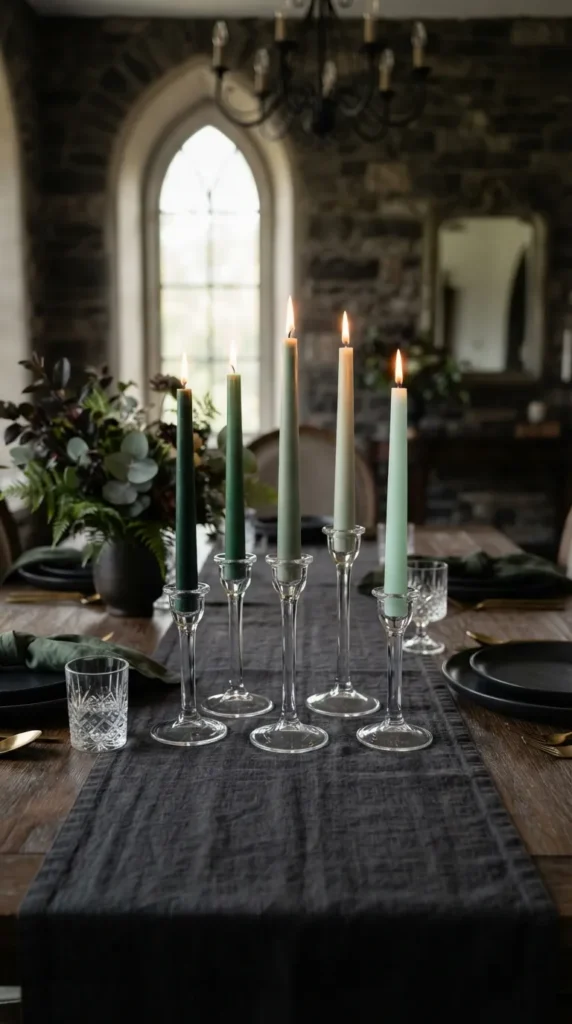
- What This Idea Means: Simple glass taper candle holders, arranged in a structured linear run, display an ombré color wash of taper candles that runs seamlessly from dark to pastel tones.
- Materials Needed:
- 5–7 Dollar Tree glass taper candle holders
- 5–7 Dollar Tree white taper candles
- Acrylic craft paints (in your chosen color palette, e.g., dark teal, seafoam, mint, pastel sage)
- Painter’s tape and clean soft sponge
- Step-by-Step Instructions:
- (Optional) Customize white tapers by using a dipping technique with non-toxic melted colored wax or painting the bottom halves using acrylic paint diluted with candle medium.
- Arrange the glass candle holders in a tight, meandering serpentine line down the center of your table runner.
- Insert taper candles in order of shade: from the deepest color at one end to the lightest pastel at the other.
- Ensure candles stand plumb by warming the base of each candle slightly before pressing it into the holder socket.
- Pro-Tips & Creative Variations: Vary the heights of the taper candles by trimming the bottoms of some candles before insertion to create a wave-like vertical silhouette across the table.
15. Gilded Geometric Gem Prism Vases
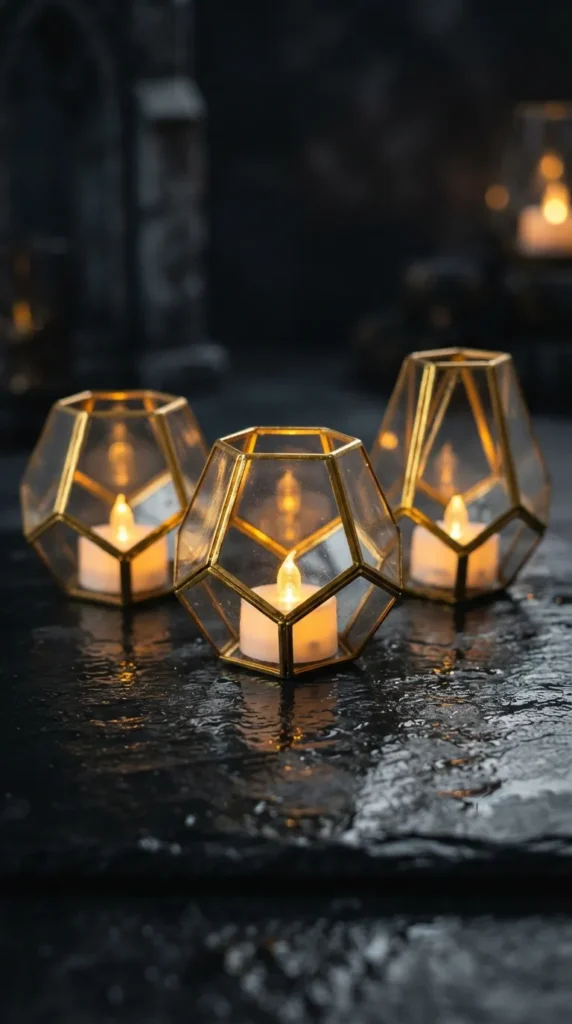
An edgy, high-glam centerpiece combining glass facets with clean metallic seam lines.